The true cost of an item is not only the price you pay to the vendor that makes or sells the item. Rather, it is that cost plus any additional costs incurred to physically acquire the item at your warehouse or storage location. NetSuite Landed costs allows you to track these costs to ensure your inventory valuation and other financial reports accurately reflect your COGS and associated income.
Below, I'll share the detailed steps to setup, use, and report on Landed Costs.
Setup Features & Preferences:
Using landed costs in NetSuite requires you to setup the following:
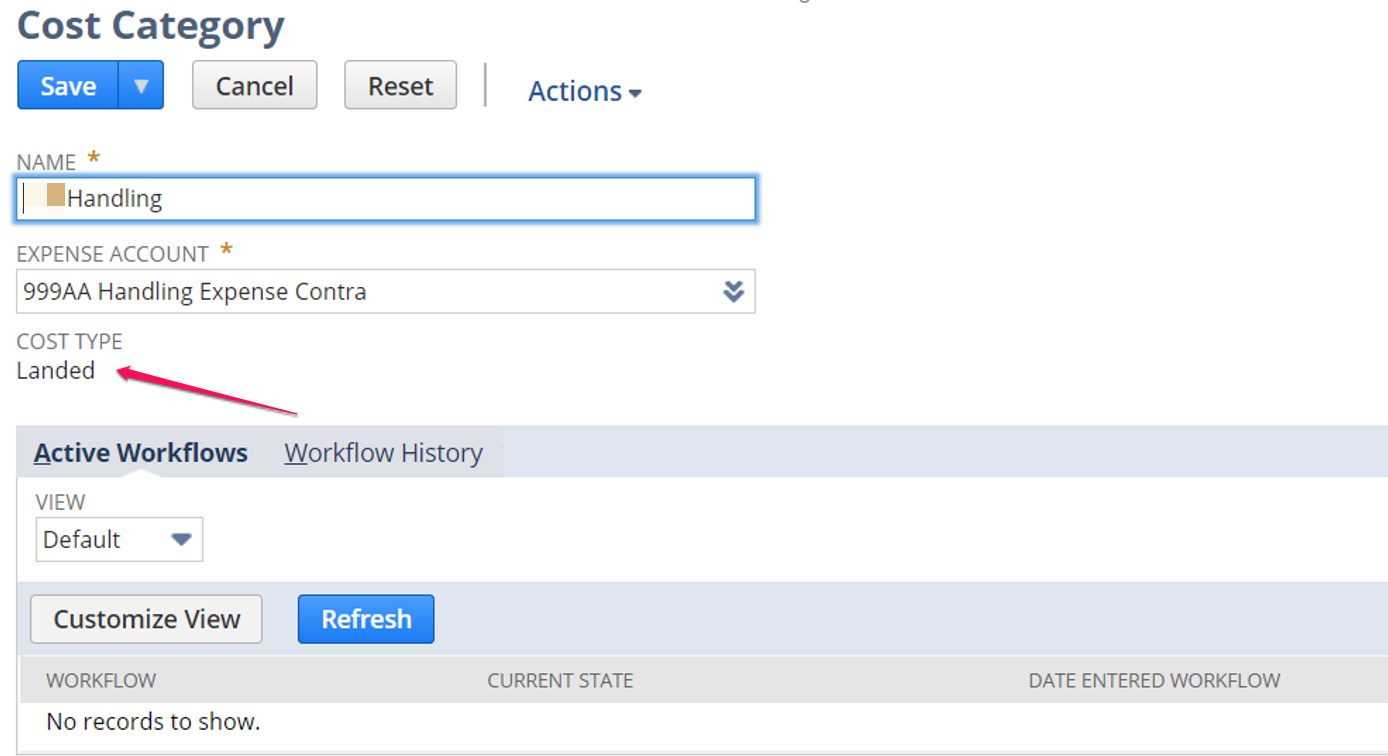
Setup Landed Cost Categories:
Setup Landed Cost Templates:
Use Landed Cost Templates to allow NetSuite to calculate Landed Costs for you.

Setup Transaction Forms:
Check to ensure that the Purchase Order and Item Receipt forms your organization uses has Landed Cost Templates column field visible, as well as the Landed Cost subtab. This may also be required on the Vendor Bill transaction if you enter items directly into a Vendor Bill without a Purchase Order.
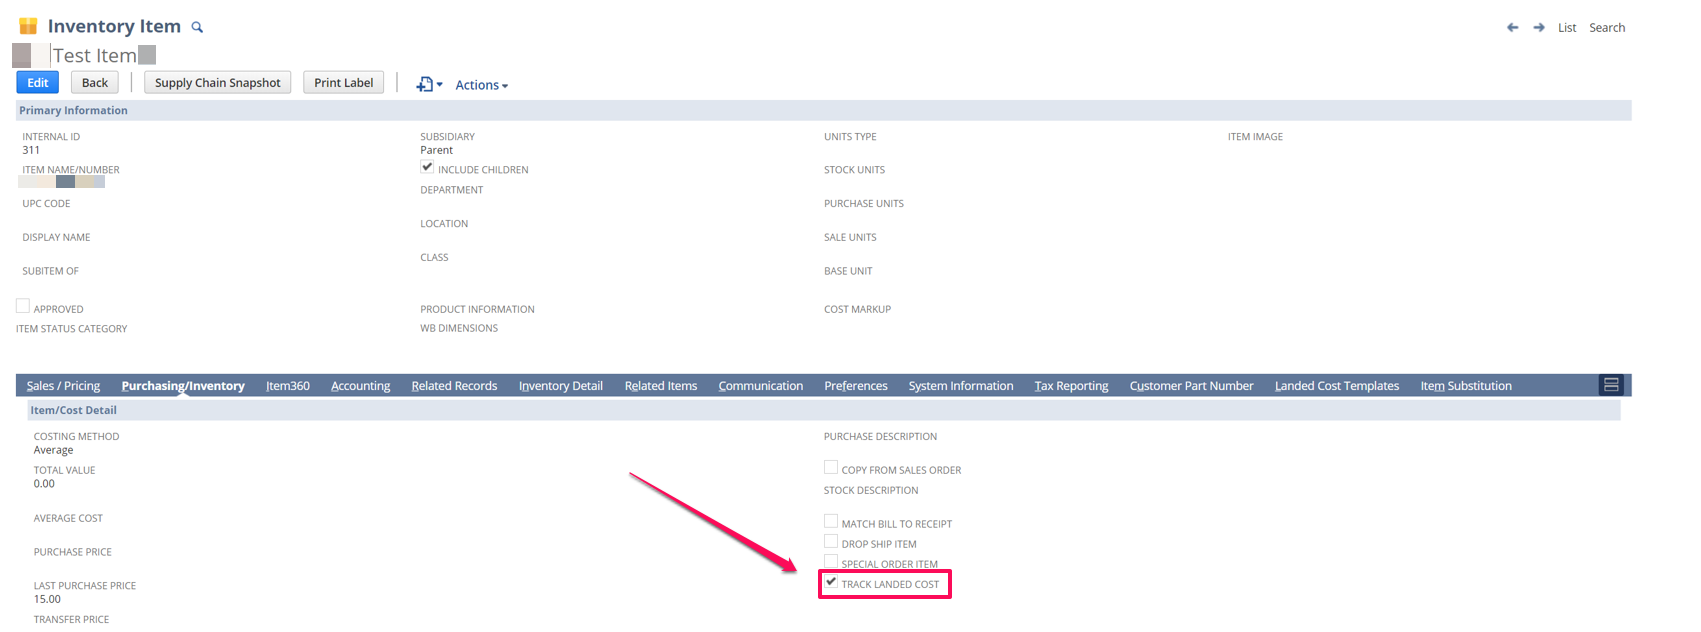
Setup Items:
Create Other Charge Items
When you receive the bill from your shipping vendor (or other landed cost related bills), you must enter a Vendor Bill in NetSuite. To do this, you must set up other charge items.
Lists > Accounting > Items > New
Select Other Charge > For Purchase
Name the item(s) the same as your Landed Cost categories such as Freight, Handling, Insurance etc.
Under the accounting subtab, select the expense account you wish to have associated to this charge. If you’re following the steps above, this would be the expense account that you created that will go against the contra accounts you set on the Landed Cost Categories.
Save the item.
Process Walkthrough:
Start by creating a Purchase Order. Select your items, quantities and save the Purchase Order. If there is any approval process associated to your Purchase Orders, ensure that the transaction is approved.
From the Purchase Order, receive the order to create an Item Receipt transaction.
On the Item Receipt, you can account for Landed Costs in 3 ways:
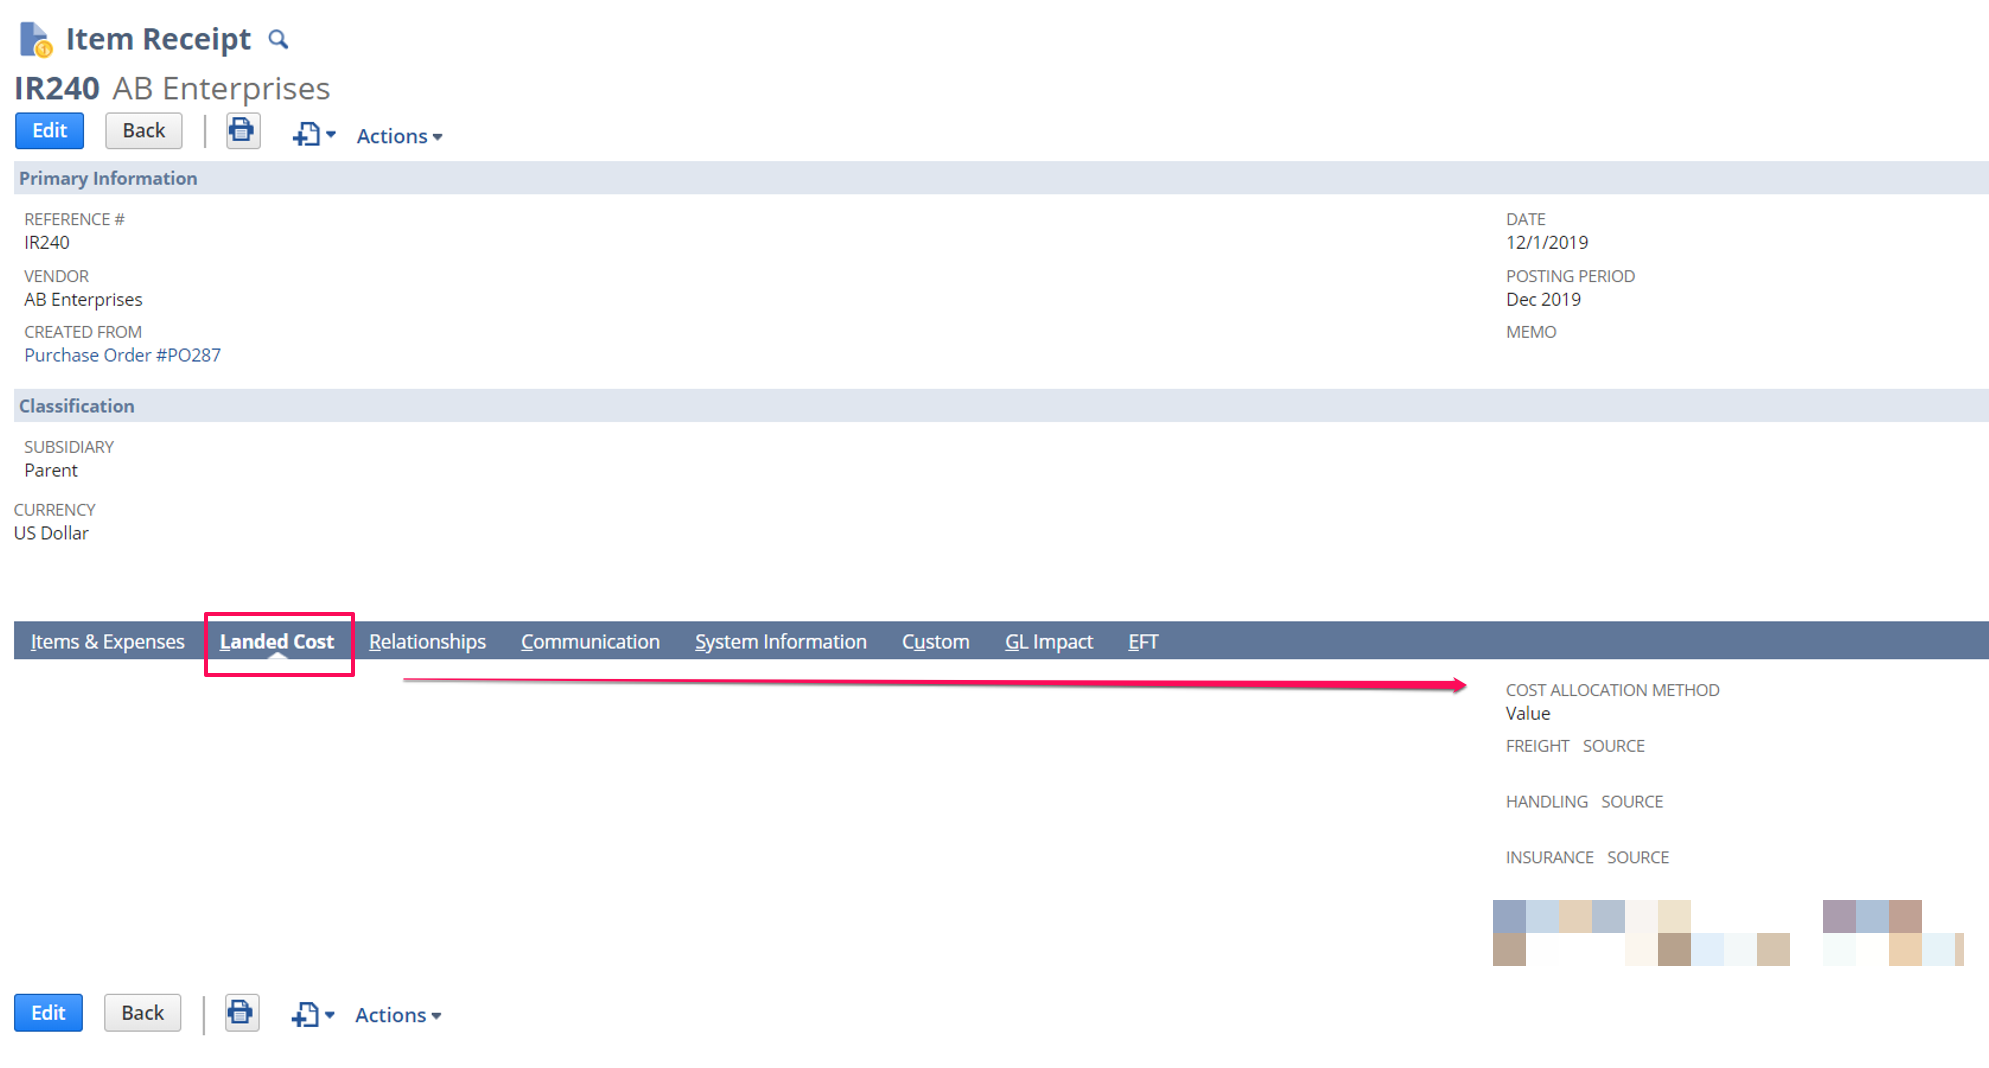
Option #1: Per Transaction – Landed Cost Subtab
Click on the Landed Cost subtab, and you will see a drop-down field allowing you to select which Cost Allocation method you would like to use. Additionally, you will see an amount field for each of your Landed Cost categories, as well as the source.
In Edit Mode:
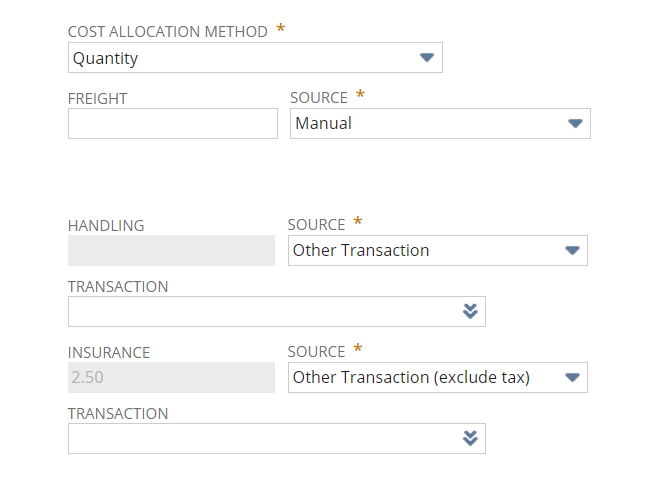
For each Landed Cost category, you have the amount, as well as the source. The source field gives you three options:
Note: For options 2 and 3 above, you must set up the Vendor Bill properly. See Enter Vendor Bill section below.
Option #2: Per Item – Manual Entry
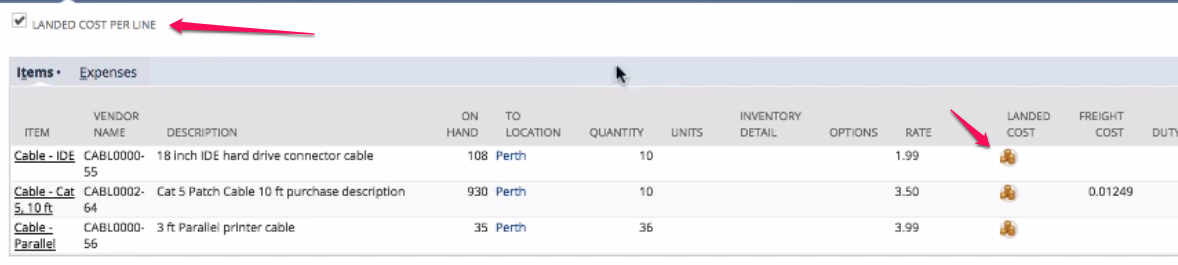
On each of the lines on the Item Receipt, you’ll see a coins icon for Landed Costs. Click it to open the pop-up window that will allow you to select the currency amount incurred for each category for that specific line (item and quantity).
To use this, ensure the Landed Cost per Line box is checked on the main tab.
Option #3: Per Item – Estimated Landed Costs Entry
On each of the lines on the Item Receipt, you’ll see the default Landed Cost template (if you are using templates) set on the items. Check the Calculate Landed Costs box on the line and save the transaction. NetSuite will calculate the Estimated Landed Costs based on the template being used for each item.
Irrespective of how Landed Costs are calculated, when you save the Item receipt and view the GL impacts, you’ll notice that the expense accounts selected on the Landed Cost categories are credited, while the Inventory Asset account(s) linked to the items are debited for the same amounts:
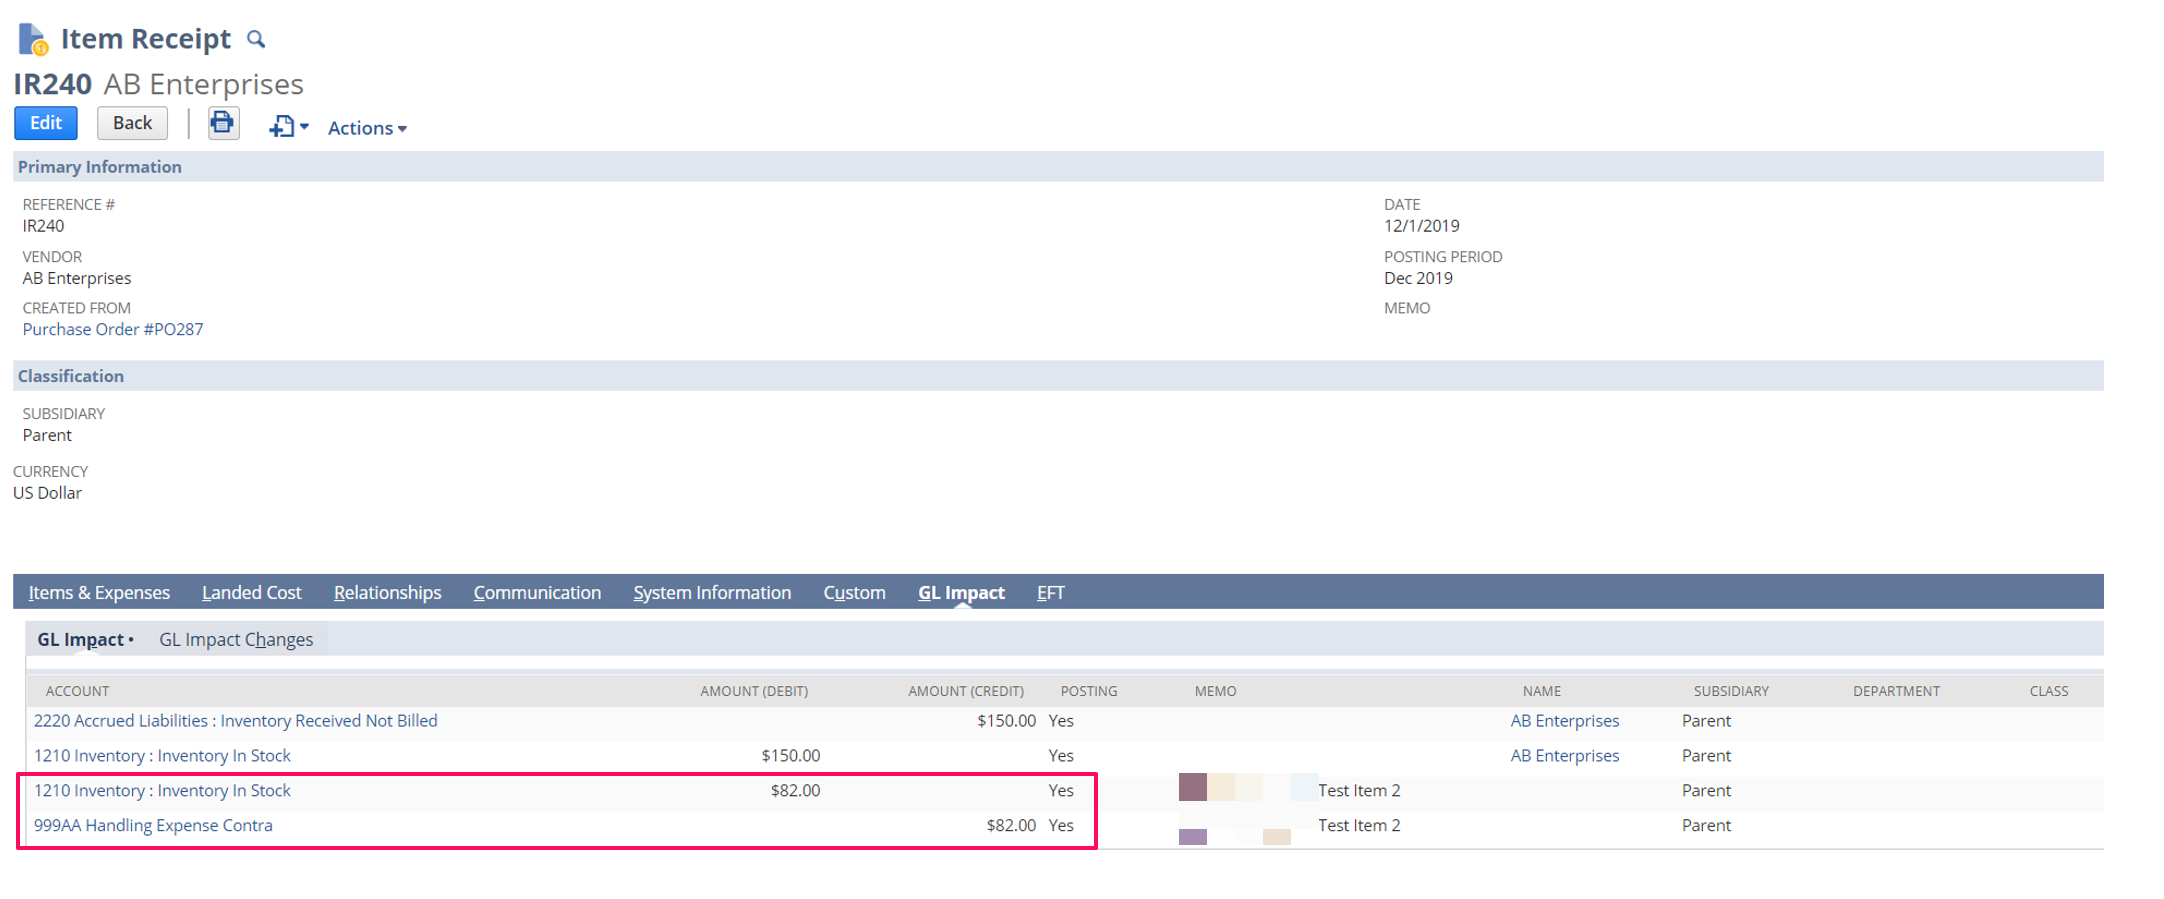
This credit is offset by the actual accrual of that expense when we enter the Vendor Bill.
Enter Vendor Bill
If you receive your Landed Cost bills at the same time that you receive items, you can enter accurate amounts on the Item Receipt and create a Vendor Bill for the matching amounts.
Assuming you receive the bill for your shipping and other Landed Cost related expenses after you’ve received the items, you’ll have to create a new vendor bill separate from the items.
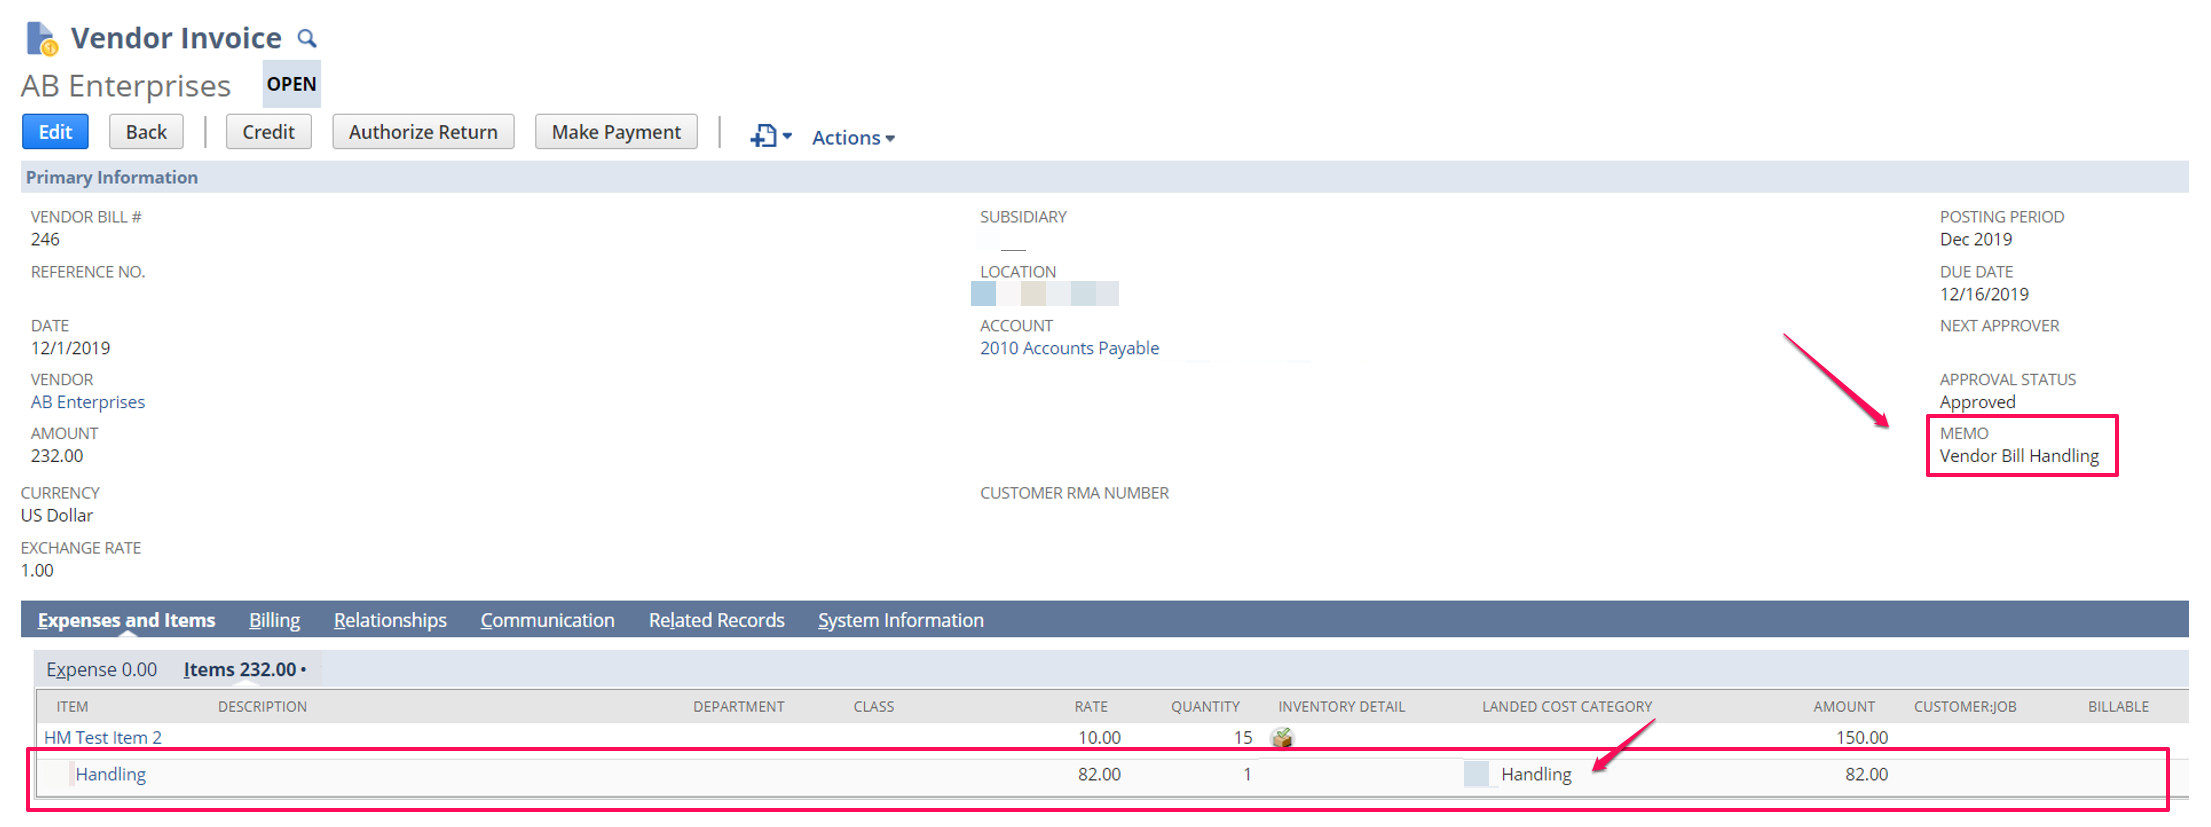
Create a new vendor bill, and under the items sublist, select the Other Charge Item(s) for the Landed Cost expenses incurred. Add a line for each category such as Freight, Handling etc. It is important to ensure that you select the matching Landed Cost category on that line as well.
Also ensure the Memo (header level) is populated in detail, as that is the field used to recognize this bill below if you need to select it on the Item Receipt. (Excited? Keep reading!)

Make the Connection Between Receipt and Expense
Once you’ve saved the vendor bill, you have two options:
If the items have already been fulfilled, their COGS will be updated as well on the Item Fulfillment records. If not, you will see the updated amount included in the COGS when you do fulfill the items.
Issues with this approach is that you can only attach one Vendor Bill to that one Item Receipt. (ie. If you have one bill for multiple receipts, you will need to break them down into multiple bills in NetSuite). Additionally, the entire applicable amount of the transaction is applied to the items, even if you receive less than the expected amount.
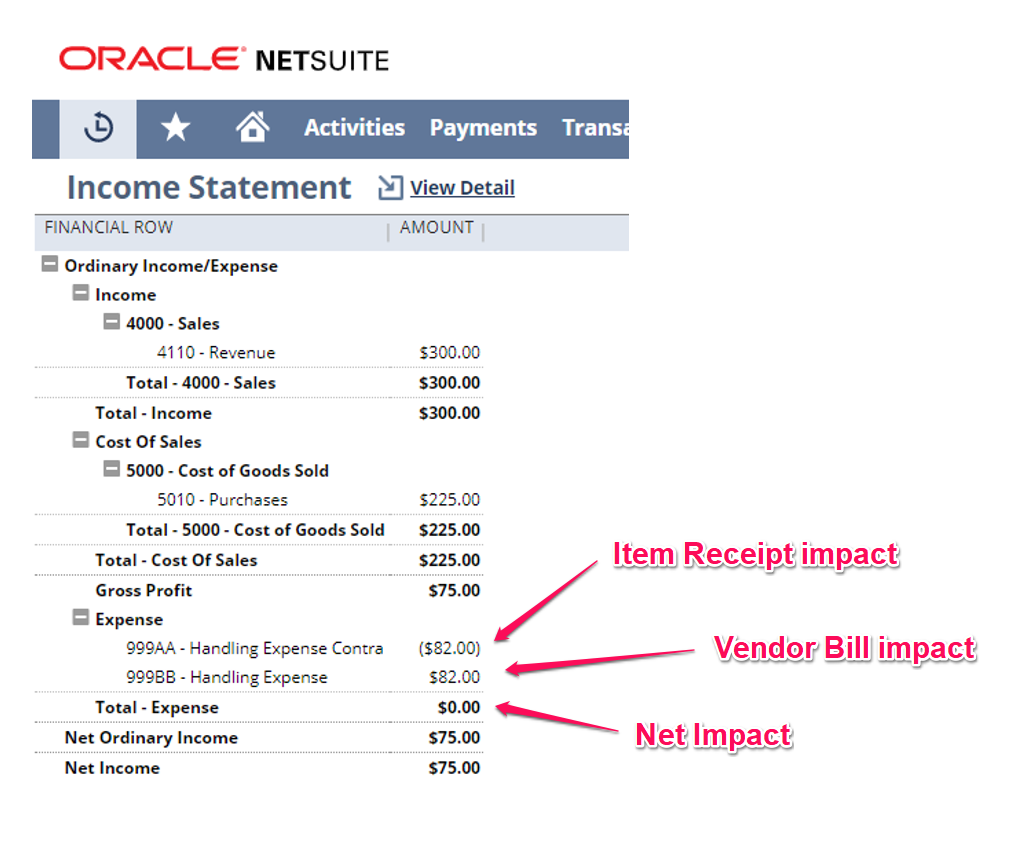
If there is a difference between the Item Receipt and Vendor Bill amounts, then that variance will be shown under the expense section on the Income Statement.
Issue with this approach is that the COGS is not fully accurate. If you overestimated the Landing Costs, your COGS will be overstated, and vice versa. However, that over/underestimation is corrected by the variance on the Expense section, and this your Net Income is accurate. Your Gross Profit, however, is over/understated due to the inaccurate COGS.
See below an example where the amounts balance out, and therefore have no variance.
There are ways to “hack” NetSuite to be able to have these costs reflected directly in the COGS section of the P&L. However, that comes with a compromise. Reach out to us using the contact us section and we’ll be happy to walk you through this path.

In a large scale migration project, 14 Lights were able to dig deep into the details of functional requirements and ensured thorough testing of all use cases prior to delivery. This team has excellent NetSuite Consultants who ensured requirements were implemented to meet our specific needs.

14 Lights brought their expertise in NetSuite, ingenuity for efficient design, and understanding of client requirements, contributing to a $6 Million Service & Repair Order process implementation. They are wonderful to work with and it would be a pleasure to work with them again.

14 Lights have been truly incredible to work with. They a true experts in their field, always guiding us to ensure things stay on track and willing to point out how things could be improved. The team at 14 Lights are great resources, extremely personable, and truly fantastic to work with.
Have one of our NetSuite ERP Certified consultants provide you with a free assessment to see if NetSuite is a good fit for your business.